Halo Infinite: Weapon Handling Prompts

World Premier of the HUD for Inifnite

As a Technical User Experience Designer at 343 Industries, I’ve had the honor of not only designing, but also implementing various parts of the HUD, front end, and game play menus.

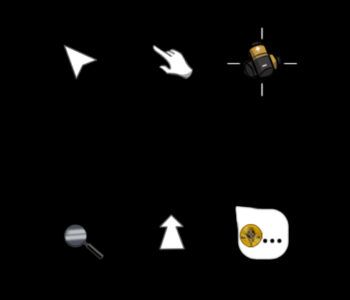
One of the simple but exciting changes you may have seen from early gameplay footage is new contextual weapon handling prompts:

Halo Infinite Reload Prompt

This is a feature that’s been popularized by the Call of Duty franchise, and is great for surfacing shooter mechanics to players unfamiliar with the genre. While returning fans and hardcore gamers will find it unnecessary, it allows us to lower the skill floor and welcome new players into the franchise, something we had decided was important for the spiritual reboot of Halo.

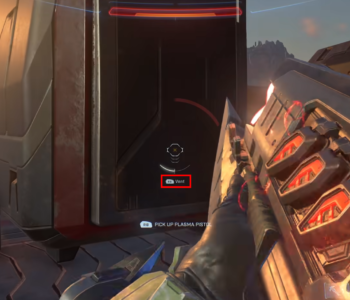
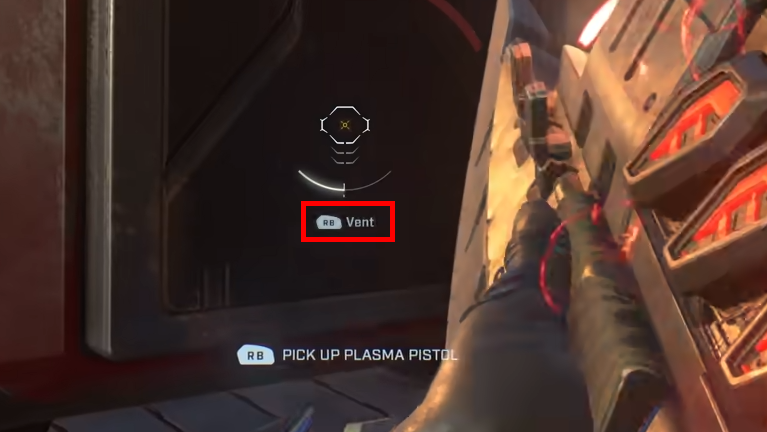
With the reload prompt in place, I realized there was now an opportunity to surface a mechanic that has been hidden since Halo Combat Evolved: Venting.

Halo Infinite Vent Prompt

While venting may just seem like the plasma weapon’s equivalent to reloading, there’s an important difference. Reloading a bullet type weapon early provides no benefit other than the tactical advantage of choosing to have a full magazine of ammo for an encounter. Reloading is also handled automatically should a player simply use up all of their ammo.

Halo Combat Evolved plasma pistol heat meter

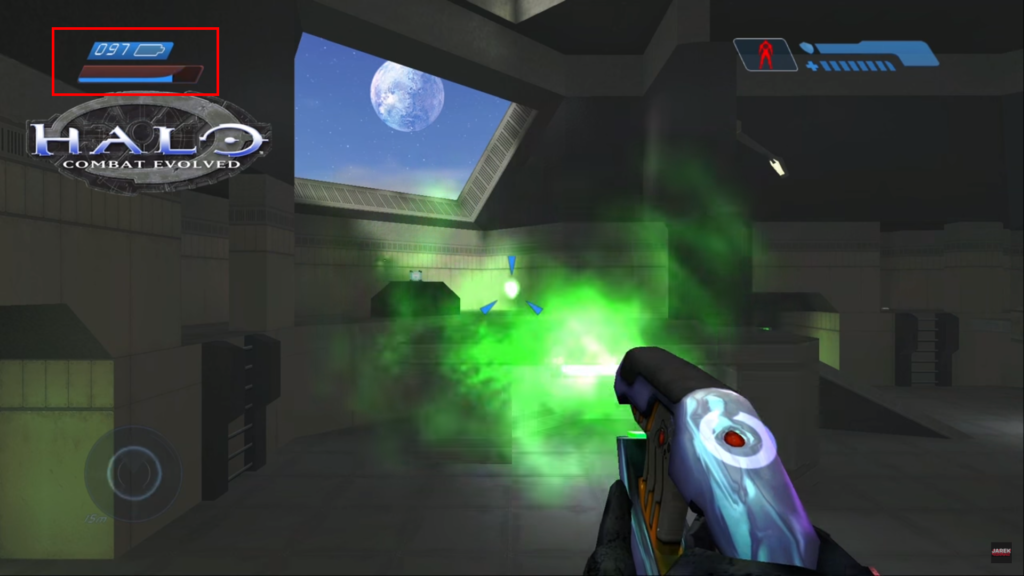
Plasma weapons on the other hand, punish the player with a cooldown period when the heat limit is reached, so shooting as fast as possible is not the optimal way to use the weapon. It is also possible that without knowing how to vent, players may believe the weapon simply needs to cool down naturally by taking extra time between shots, which puts them at a large disadvantage to players who cool the weapon between shots by venting.

Simplifying the Graphical User Interface

Much like Utada Hikaru’s hit 2002 song, the art for Endora’s Box is best described as ‘simple and clean’. It only made sense to design a user interface to match.

My goal with the interface was to have it be the least intrusive that I could make it. I wanted all of the focus to be on the art. To do this, the menus work on a context based system and disappear and re-appear as needed.

Here are the different components and how they work:

Dialog box:

This works both for talking to characters, and for a narrative inspection of surrounding objects. When speaking to a character, the font and text color will change depending on character, and a name will be displayed in a small upper box. When receiving narrative inspection, there is no upper box and text is a default font and color. When this interface is visible, the inventory bar, and thus the trashcan are not visible.

Inventory bar:

The inventory bar is one of two interface pieces that is constantly visible. This is so that the player can always quickly see what they are holding, and equally quickly use those items. The art for the bar is as minimal as it gets, done in white scratchy boxes to match the game art. When mousing over an item in the bar, a small description box will appear above the inventory bar to explain what the item is.

Trashcan:

Players can drag items to the trash can to discard them (limited items will re-appear near where they were acquired, unlimited items disappear and will need to be recollected at their source). While technically part of the inventory management system, this interface is hidden until the player begins dragging an item from their inventory. It is placed on the very opposite side of the screen from the inventory bar to prevent action slips where players could accidentally discard an item.

Cursor:

The cursor is the second part of the interface that is constantly visible. In it’s default state it looks much like the cursor for a regular computer, but when it hovers over different objects, it will change to various images that reflect the different actions that you can take with each object. Examples of interactions are a magnifying glass to ‘inspect’ and a speech bubble to ‘talk to’.  (See this post for full coverage of the design behind the ‘Context Cursor’ system).

Affordance and the Context Cursor

The context cursor is a mouse pointer that changes to help imply how an object or character can be interacted with. This gives Endora’s Box an immediately understandable interface that really needs no text explanation. The main concept behind this system is, of course, affordance. Each cursor was carefully designed to afford the context of the player’s click before they’ve decided to click.

The tricky part of this system was deciding how to simplify all possible interactions in the game into just a few recognizable symbols. The key was to combine mechanically different, but conceptually similar actions together under the same cursor symbol. The Magnifying glass cursor for example means, broadly, ‘to inspect’. Within the game this can either bring up the dialog box to provide a narrative inspection of the item, or it could pop up a zoomed in view of the scene which provides more interaction options.

Here are the six cursors and their purposes:

Default Cursor (indicates when no interactions are available under your cursor position)

Pointer Hand (touching / collecting items in the game world)

Speech Bubble (talking to characters)

Magnifying Glass (pops up a zoomed in view of a scene or gives dialog about the inspection of the object)

Item (when dragging an item from inventory, your cursor becomes the item)1

Speech Bubble embedded with item (when dragging an item over a character, show / give this character the held item)

This careful and consistent system allows me to not only simplify the interface, but also hide secret content in plain sight, without having it be immediately obvious, but also without having it be unintuitively hidden. Here for example, I have a row of singing, wall mounted bass. One of them is actually a secret, sentient character named “Basstion” who will give you a side quest if you notice that your mouse turns to a speech bubble when hovering over him. Since he is visually identical to the other fish, he would likely only be accidentally discovered without the context cursor.

Designing A Successful Tutorial

Some general tutorial goals

  • Players don’t like to be told what to do. Give them clues and let them figure it out and they will learn much better.
  • Every step of the the tutorial should teach more than one thing. Time is valuable, so cram as much learning in as you can and get into the game.
  • Make the tutorial engaging. I chose an empty void to reduce distractions, but also because it ties closely into the narrative of being absorbed by Endora’s Box and entering a strange new world. It is also designed to resemble regaining consciousness, and when it’s over, you’re not sure if it really happened or not.
  • Let the player dictate the pace through interaction. The only part of the tutorial that the player can’t control is a few lines of dialog with the gatekeeper. I kept this to an absolute minimum so new players get the hints they need, but returning players don’t sit through a wall of explanation.
  • Review your basics! Most gamers consider WASD and arrow keys to be obvious methods of movement, but you should not skimp out of teaching any of your core interaction methods. Point and click is the basis of most interactions in Endora’s Box, so it was critical that I spend some time to solidify that as a type of interaction before introducing more unique concepts.

Designing the tutorial took a few tries, much user testing and plenty of review

Initial testing of the game revealed two major reoccurring problems:

  • Over half of players forgot to keep using the black light after leaving the tutorial. They would get to a new room, miss all of the hidden black light clues and think: “Nothing here! Must have missed something in an earlier room.” before proceeding to backtrack.
  • Players rarely showed items to characters, even when out of other options. All characters have unique dialog to provide small hints about each object shown to them to guide the player in the right direction. The ducks, for example require you to complete a recipe to make them ‘food’, without specifying what food item they want. Some components of the recipe are indeed ‘food’, but when giving these items to the ducks, they will explain why they do not want that, and berate you about following the recipe, which hints that you should go back and actually complete the recipe.

Here are the  solutions to these problems that I’ve included in the final tutorial:

  1. It is very difficult to complete the tutorial without using the black light (it teaches the player walking controls, but even if the player had figured those out on their own, the black light also reveals the key to the door that prevents progression, and also reveals the light switch that reveals the door that exits the tutorial)
  2. The room directly after the tutorial will AGAIN require you to use the black light. If you have forgotten how to use it by this point, Bugaboo (a helpful reoccurring NPC) will offhandedly remind you to use your black light after talking to him a few times.
  3. The next room and many later rooms have permanent black-light sources that constantly partially reveal the hidden text to remind players to keep using their black light in every room.

Teaching in an order that builds new knowledge off of each point

To be able to teach effectively, you need to know what information is prerequisite to each other piece of information. Using the inventory system as an example, the player must know that they can click on things before they can click and drag inventory items. As a designer, the best way to get this information was testing different tutorial iterations with my target audience and noting where people stumbled. After about three different designs, here is the order that worked best:

1: Things can be clicked, and  the mouse will change to a pointer hand when things can be clicked.

2: Items can be collected (optional how to read environment objects).

3: Black light can reveal hidden things.

4: WASD or arrow keys to walk, hold shift to run, and helpful hints can be hidden in black light.

5: Reinforce pickup items, black light can hide required items.

6: Picked up items go into inventory, and mouse over inventory items for a description.

7: Drag items from inventory onto objects in world to use them, and when dragging items, a discard option appears.

8: You can give a character different items for different responses.

9: Black light reinforcement.

10: Recap of controls that can be revisited at any point.

A breakdown of each step:
While I highly recommend that you go play the tutorial for yourself to see how it feels (it’s free on GameJolt and other indie sites), I will also break it down step by step below.

1 and 2: The first thing you see is a blue orb, falling from the sky. It lands and the lights fade in to show a character getting up off the ground. A picture fades in that illustrates a mouse clicking the left button to pick up an item. With no instruction and nothing else to do, the player will mouse over the orb, which changes the cursor to a pointer hand, which is a cue to click, which collects the orb (See this post for full coverage of the design behind the ‘Context Cursor’ system).

3Another painting fades in with a simple illustration of a right mouse button being pressed and a blue light. The player can then right click and their black light is activated, after moving the mouse around they will discover blue arrows that are invisible outside of the radius of the black light. These arrows point to the instructions for how to move the protagonist using A and D to walk, and Shift to run.

4With further inspection, you’ll find arrows that point to the left, indicating that the player actually needs to move left instead of right.

5A trail of arrows will lead to a locked door that blocks the way. It is unlocked by an invisible key that can be revealed by using the black light. Once clicked, the key will fly into the player’s inventory.

6When mousing over the key, a description pops up. It says “Drag this key to a door to use it”.

7When dragging the key onto the door, it unlocks and disappears, allowing the player to pass

8: Further along, the Toll Keeper will stop the player. He states that you cannot pass until you’ve paid the toll. The player is likely to give Toll Keeper the Coin item (which is found nearby), assuming that the toll required to pass is money, but he will refuse it and hint that he only accepts items of sentimental value. When mousing over items in the inventory, the player will notice one is labeled “Your favorite mixtape”, the only object in their inventory that could have any sentimental value.

9: The end of the tutorial has the player run into an area with no lights. The small light emitting constantly from their phone will conveniently reveal a light switch once the player has run as far left as they can. This is a fail safe so they can see the light switch even if they are not using the black light like they should. Once the light is turned on, the tutorial is over, and the player is locked out of the tutorial area for good. The only way out is a door in the now small closet that the player stands in.

10All of the controls are repeated in the background of this area so the player can re-visit here for help.

Other design fun facts:

The tutorial is purposefully designed to make the player walk from right to left, this not only helps with the jarring atmosphere of the narrative, but subvert’s the player’s expectations of a traditional left to right level. A large gate is placed just to the right of where the player wakes up to play into this expectation, but when clicked it explains that it is locked permanently.